Installing a storm door closer is a practical DIY project to prevent door damage and enhance your home's functionality. This guide walks you through the process of installing a door closer, ensuring your storm door shuts smoothly and securely every time.
Storm Door Closer Installation Steps

1. Gather Tools
Tools Needed:
- Drill with bits
- Screwdriver
- Pencil
- Measuring tape
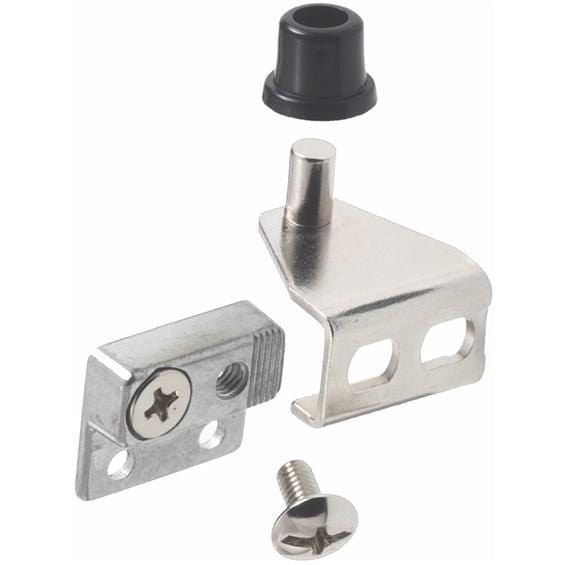
- Door closer kit (includes a jamb bracket, a door bracket, 4 long screws, 4 short screws, and 2 pins for attachment).
2. Check Door Alignment
Begin by ensuring your storm door is hung correctly and aligned.
The door should swing freely without catching or dragging. If there are any alignment issues, address these before installing the closer, as they can affect its performance and longevity.
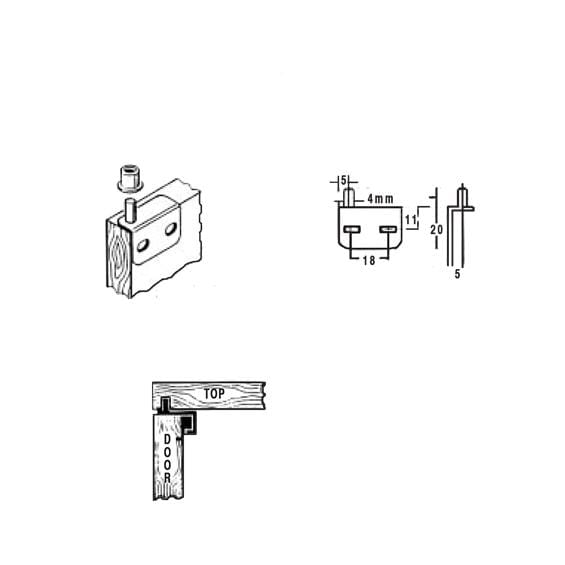
3. Install Jamb Bracket
- Position the bracket 6 inches down from the top of the door frame
- Place 1/2" to 3/4" inches from door stop edge
- Mark screw holes
- Pre-drill pilot holes
- Secure bracket with provided screws
4. Mount Door Bracket
- Position 6" inches from the top of the door
- Align with the jamb bracket
- Pre-drill holes (use existing holes if present)
- Secure bracket firmly
5. Attach Cylinder
- Connect the cylinder to the jamb bracket using the provided pin
- Open door fully
- Extend cylinder to door bracket
- Secure in place
- Ensure the cylinder is parallel to the ground
6. Adjust Speed Settings
Most door closers come with adjustable speeds controlled by small screws on the cylinder.
First, locate the adjustment screws on the cylinder. The main swing speed screw controls the overall closing speed. The latch speed screw manages the final few inches. Then:
- Start with both screws in the middle position
- Turn clockwise to slow down
- Turn counterclockwise to speed up
7. Test Door Operation
Open the door fully and release it; it should close smoothly without slamming, and latch completely.
- If closing too quickly: turn the screws clockwise
- If closing too slowly: turn the screws counterclockwise
Make only quarter-turn adjustments at a time. Test after each adjustment, and continue adjusting until the door closes and latches properly
8. Install Hold-Open Feature (Optional)
Many door closer kits include a hold-open washer or mechanism. If you want the option to keep your door open, install this feature now. The hold-open washer typically slides onto the cylinder rod and allows you to prop the door open at about 90 degrees.
9. Add Wind Chain
Wind chains are important accessories that prevent wind damage and provide additional protection by limiting how far the door can open in strong winds. The chain is usually installed near the bottom of the door.
Final Thoughts About Installing Storm Door Closers
With proper installation and maintenance, your storm door closer should provide years of reliable service, protecting your door from wind damage while ensuring convenient, controlled opening and closing. If you encounter any issues during installation, consult a professional for assistance to ensure proper functionality.